How To Set Up Snowboard Bindings

Setting up and maintaining your bindings helps unlock your snowboard’s optimal performance and longevity.
Binding setup influences your overall stability and mobility and the ease with which your snowboard turns on the hill.
Bindings should be positioned with the following:
- The shape and width of your snowboard
- Your height
- The snow conditions
We’ll explore each of these in more detail in the following sections.
Determining Your Snowboarding Stance
The term “stance” refers to placing your bindings on your snowboard. More specifically:
- Your leading foot
- The width between your bindings
- Being centred or setback from the reference width
- The angles of your bindings
Read on to learn which stance works best for you.

Leading Foot
Just like being right or left-handed, we all have a dominant foot. In snowboarding, we usually set up our dominant foot as our rear foot; however, the terms “goofy” and “regular” refer to which foot is our leading foot.
Goofy-footed snowboarders ride with their right foot forward.
Regular-footed snowboarders ride with their left foot forward.
The following tests can help determine if you’re goofy or regular:
- Which foot do you use to kick a soccer ball? This is probably your dominant, and therefore, rear foot.
- Have a friend lightly push you from behind and note which foot you put forward first. The foot you put forward is probably your dominant foot, and therefore, your rear foot on a snowboard.
Begin with your best judgment as to which foot is your leading foot and be prepared to switch if it doesn’t feel natural. To make this switch easily, beginners should start with a centred setup (twin board with 9° and -9° degree angles).
Natural Stance: When someone refers to your natural stance, they are asking if you normally snowboard goofy or regular-footed.
Switch Stance: This means that a snowboarder is riding opposite of their natural stance (i.e. a goofy snowboarder riding regular).
Width
When asking yourself, “How far apart should my bindings be?” know that binding width has a direct impact on two things: stability and mobility.
- Narrow stances increase mobility and decrease stability.
- Wide stances increase stability and decrease mobility.
Why are mobility and stability important in snowboarding?
Mobility refers to your ability to move your lower joints (hips, knees, and ankles) to manage pressures and turn your board.
Stability refers to your ability to resist falling when going fast, snowboarding through bumpy terrain, or landing a trick in the terrain park.
A good starting point is to set a stance width equal to the length of your elbow to your knuckles – set the same distance between the inside wall of your front binding to the inside wall of your back binding. You can also start with your stance about shoulder width apart.
From that point, you can customize your stance width to suit your riding style. When speaking about your stance width, it is common practice to refer to the distance between the centre of both bindings, e.g., I have a 21” wide stance.
Centered vs. Setback
Every snowboard comes with small markings on the top sheet to indicate the reference stance, located around the middle-point of the binding mounting system. This makes it easy to measure your stance width and figure out the angles of each binding.
The reference stance is the position that works best with the side cut and the board's shape.
A sidecut is the curved edges of your snowboard, allowing you to make round turns on the snow. The reference stance places us with our weight equally distributed on either side of the sidecut. This positioning lets us control our turns.
To learn more about the shape, sidecut, and profile of the different types of snowboards, check out our dedicated article on “How To Choose A Snowboard”.
Because a snowboard performs optimally with bindings mounted at the reference stance, it’s important to move bindings equally from these markings when deciding to stay centred or setback your bindings.
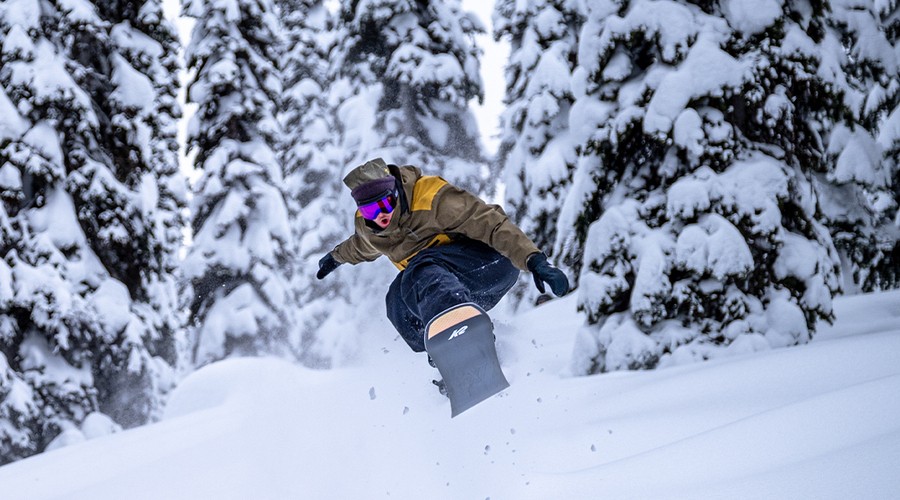
Why would you want to setback your bindings? Powder. Setting your bindings back keeps your weight centered over the tail of your snowboard which helps the nose stay up and out of deep powder.
For this reason, dedicated powder boards generally have a directional shape and come with a mounting system located closer to the tail than the nose.
A centred stance is ideal for riding groomed runs, terrain parks, and all-mountain riding.
SHOP MEN'S SNOWBOARDS SHOP WOMEN'S SNOWBOARDS

Determining Snowboard Binding Angles & Height
Binding angles are the degree to which our feet are pointed towards the nose or tail of our snowboards and are a matter of personal preference for snowboarders. The main terms are:
- Positive, meaning pointed towards the nose of the snowboard
- Negative, meaning pointed towards the tail of the snowboard
- Duck foot, meaning the front binding is positive and the back binding is negative
- Double positive, aka racing stance, meaning both bindings are pointed towards the nose
Most snowboarders ride with duck foot angles with the front foot slightly more open (positive) to help the hips face slightly downhill. A common example of binding angles for intermediate riders is 15° and -9°.
Binding height refers to the height of the high back. These come in three different sizes:
- Lowback
- Mid
- Highback
A highback is designed to transfer the energy generated by your body when doing a heel-side turn. A lowback will not transfer as much energy as a high highback, but it will allow for a greater range of motion in the ankles.
Many snowboarders who focus on rails and flatland tricks will choose a lower highback, while those who focus on turn performance will choose a regular-sized highback.
To optimize the transfer of energy and the performance of your bindings, keep reading to find the section on “How To Adjust Snowboard Bindings”.
To learn more about what to look for in a pair of bindings, check out our dedicated article on “How To Choose Snowboard Bindings”.
Tools and Steps for Mounting Your Bindings
To mount snowboard bindings for the first time you’ll need:
- A #3 Phillips head screwdriver to mount the disks
- A #2 Phillips head screwdriver to adjust the components of your bindings
A pocket tool includes both of these and is a must-have for making on-hill adjustments.
Most resorts have dedicated tool benches and the necessary tools for binding adjustments at the base of the chairlifts.
Four-Hole Disks (4x4)
Follow these steps to mount your bindings onto a classic four-hole mounting system found on most snowboards:
- With the binding unmounted from the snowboard, place your boot in the binding and adjust the toe ramps (the section under your toes) so that the inside of the ramp is lined up with your big toe. See the next section for specifics on how to adjust toe ramps.
- Remove your boots from the bindings in preparation for mounting them on your snowboard.
- If your bindings have them, remove the cushioning from the baseplate to reveal the mounting disk.
- Remove the disk from the baseplate of your bindings.
- Locate the reference stance on your top sheet.
- Place your bindings on the board with the four reference holes lined up in the centre of the bindings. The strap buckles should be facing outwards towards the tip and the tail.
- Place your bindings with the approximate angles you desire.
- Place the disk in the bindings with the adjustment slots facing from edge to edge rather than from nose to tail.
- Loosely screw the four screws working in diagonals, kept loose enough to allow you to set the desired angles and ensure that the bindings are centred between the toe and heel edges.
- Once the placement seems correct, hand-tighten the screws in a diagonal pattern.
- Do not tighten the screws with a power drill as this can over-tighten and damage the snowboard.
- Tighten the screws once more after your first run.
Channel Systems and Two-Hole Disks (2x4)
There are bindings called EST bindings which are designed to work explicitly with channel systems. EST bindings have two wings with adjustment slots that extend from the side of the baseplates and attach to the channel inserts using two screws.
Most bindings come with a two-hole disk which is designed for channel systems.
To mount two-hole disks into a channel system, follow the same process as described for mounting four-hole disks into classic inserts. The only difference is there are only two screws per binding.
How To Adjust Snowboard Bindings
Snowboard bindings are customizable to your body and riding style. Adjusting your bindings is how you can optimize the full potential of your equipment and your snowboarding.
As your snowboarding progresses and your body changes, don’t be afraid to adjust your bindings to follow suit.
Straps
Straps are what hold your boots into your bindings. A classic four-strap system includes:
- Ankle strap is attached to the binding with an adjustment slider containing a ratchet buckle.
- Toe strap or toe cap containing a slider and ratchet.
- Ankle ladder strap to receive the ratchet buckle.
- Toe ladder strap to receive the ratchet buckle.
Adjust the #2 Phillips screw on the adjustment slider of your heel and toe straps to centre them over your boot.
The ladder straps should have enough length to ensure that the ratchet buckle is never ratcheted to its maximum length.
Toe Ramps
Toe ramps are designed to give the toe of your boot a little extra lift to minimize toe drag. Toe or heel drag is when your boot touches the snow mid-turn.
Toe ramps are attached to the base plate and can be adjusted to various lengths to match your boot size. They can be clip-in or require a #2 Phillips screwdriver for adjustment.
Footbeds
Footbeds are designed to cushion our feet from the impacts we experience in snowboarding. They can be adjusted to fit the length of your boot either as a unit or with a separated toe ramp. Adjustment is either clip-in or done with a #2 Phillips screwdriver.
Some bindings come equipped with canted footbeds and others offer them as an after-market product. “Canted” means that the footbeds are slightly angled to raise the outside of the foot for a more ergonomic position while snowboarding.
Highbacks
Highbacks are the part of the binding that sits up against the back of your boot.
Their purpose is to transfer the energy generated by your body movements directly into the snowboard. To give more energy transfer to the board, some snowboarders adjust their highbacks so that they are lined up parallel to the edge of their snowboard.
The adjustment can be made with the two screws securing your high back to the heel cup of your binding. After removing the #2 Phillips screws, rotate the highbacks until they are in line with the edge and then refasten.
Forward Lean
Forward lean is the angle at which your highbacks are pushing against the back of your boot.
The purpose of forward lean is to optimize the energy transfer to your board and to keep you in an engaged position with your knees bent while snowboarding.
Forward lean adjustment comes down to personal preference, and at a minimum, your forward lean should be adjusted to an angle that eliminates any gap between the high back and your boots.
Adjust forward lean by using the clip and adjustment slider located on the rear of the highback.
Troubleshooting Common Problems with Snowboard Bindings
Snowboard bindings can endure a lot of wear and tear during their lifespan and might eventually show some of these common problems.
Loose/Misaligned Bindings
Snowboard bindings can become loose through regular use which can be risky if left unchecked.
If you notice your binding is moving slightly or a lot, stop immediately and seek out a tool station. Tighten your screws to secure your bindings.
If your bindings are constantly becoming loose, using a bit of thread locker – a type of screw adhesive – after drying out your equipment can help.
Check the tightness of your binding screws at regular intervals throughout the season, as they do loosen through regular use. In most cases, quickly tightening the screws will solve the problem, but it is smart to double-check at the beginning of each day on the mountain.
Painful Pressure Points
Experiencing pain or pressure points because of your bindings isn’t normal. The first thing to check is if you have the correct size of bindings for your boot size.
The next thing to check is that your straps are centred over your boots.
Lastly, check if you are wearing boots that are suited to your feet. For more details on boot selection, check out our article on “How To Choose Snowboard Boots”.
Difficulty Strapping In or Out of the Bindings
Binding straps can occasionally create difficulty in releasing your bindings. This is most often due to the ratchet buckle.
Ratchet buckles are a simple latch and spring mechanism which can sometimes get jammed up with snow or ice.
If your buckle won’t release or secure, lightly tap it to dislodge any debris. If this doesn’t work, you can use your fingers to manually pull the locking tab open or push it closed.
Sometimes the spring in a ratchet buckle can fail and requires replacement. Most companies sell spare parts for their bindings.
Broken Straps
Snowboard binding straps can break and it is a normal part of the wear and tear of snowboarding.
Keep an eye on the integrity of your straps, including the adjustment sliders, the ladder straps, and the ratchet buckles. It’s better to replace a strap that is showing wear before it breaks mid-turn.
Purchasing a set of replacement straps and storing them in your pockets or gear bag is a good way to be prepared in case the local snowboard or tuning shop doesn’t have any on hand.
To help your straps keep their shape and minimize the development of weak spots, ratchet your straps closed whenever not in use or when being prepared for short or long-term storage.
For more tips on how to correctly store your gear for the off-season or travel, check out our article on “How To Store a Snowboard and Snowboard Boots”.
When To Replace Bindings?
Snowboard bindings can last a long time when regularly maintained. However, all products have a life cycle and you might need to replace your bindings due to wear and tear or advancements in technology.
Straps, highbacks, and footbeds can all be replaced as needed, but if the baseplate of your bindings is broken or compromised in any way, it is time to replace your bindings.
Snowboard bindings are the most important piece of equipment in your setup alongside your boots and snowboard.
Bindings are designed to be customized to your unique body and riding style and should be regularly inspected and maintained to keep you safe and riding at your best.
Related Articles
How To Stretch Snowboard Boots
